Download Holo.Server
Holo.Server provides installation files for both Windows and macOS operating systems. The installation process for each platform differs, so ensure to follow the specific instructions for the respective operating system below.
This guide will walk through the process of setting up Holo.Server and establishing connections. Please explore the steps to install and use it effectively.
EXPLOREHolo.Server provides installation files for both Windows and macOS operating systems. The installation process for each platform differs, so ensure to follow the specific instructions for the respective operating system below.
Once suitable Holo.Server binaries have been downloaded, please start the installation process for Holo.Server. The installation process is nearly automated, guided by a few simple user interactions, it ensures that all necessary components are in place.
Important Note for Windows Users:
During Holo.Server installation, encountering the User Account Control (UAC) prompt is part of the process, as it requests special permissions for the installation of all necessary components.
Upon successful Holo.Server installation, it is now ready for the first launch and further configuration.
Important Note for macOS Users:
During the first launch of Holo.Server, macOS users are required to grant specific app permissions:
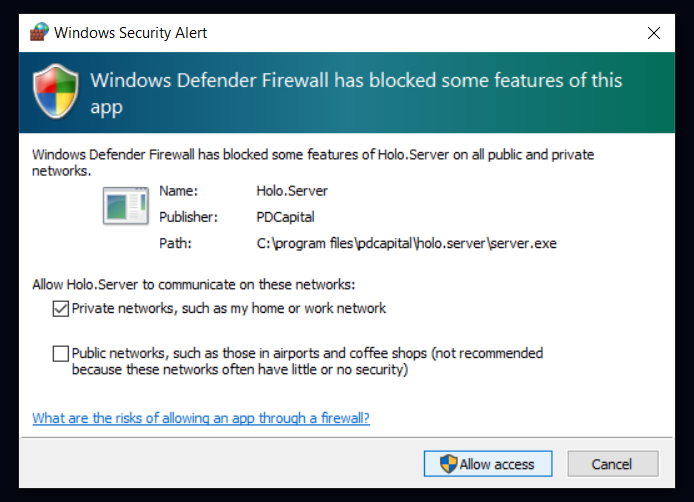
Important Note for Windows Users:
Upon the initial launch of Holo.Server, Windows users need to grant firewall permissions:
All of these permissions are crucial, as Holo.Pen’s proper functionality relies on their activation. Please be aware that an additional application restart will be required, prompted by macOS.
After a successful launch, Holo.Server appears as a discreet icon in the macOS system menu or the Windows system tray.
To delve into additional configuration options, simply click on this icon with right mouse button to access the Settings menu for the Holo.Server.

In this screen, there are options to:
Furthermore, there is the option to adjust the application language according to individual preferences.
To halt the Holo.Server, locate the application icon in the macOS system menu or in the Windows system tray. Right-click on the icon and select the “Exit” menu item to halt the Holo.Server.
This action will suspend the collaborative capabilities and screen sharing until the Holo.Server is restarted.
Firstly, halt the Holo.Server, and then follow the appropriate procedure for the respective operating system.
On Windows:

On macOS: